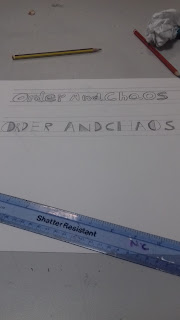
Posts

Showing posts from 2017

Evaluating images

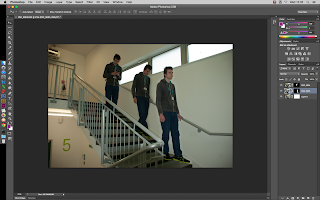
You are going to look at another person's work 1.Firstly use 5 words to describe that work intresting in focus good colour 2. Now comment on the images form This means looking at the formal elements of an artwork. ●       What is the medium of the work? It is a digital pigment print image that has been edited in photoshop useing the multiplicity technique. ●       What kind of shapes or forms can you find? It has his dog as the main subject and has a fence in the background. ●       Which   techniques have they used? Mutilplicity to dupiclate his dog in mutiple places. ●       What kinds of textures can you see? The grass has a spikey or rough texture to it and the dog its self looks like it has a smooth coat. 3. Finally consider the mood and meaning of the work Mood means looking at how the artist has created a certain atmosphere or feeling. ●       How does the work make you feel? It made me feel happy. ●       Why do you thi

Jem Southam

Image
Jem Southam research  Born in Bristol in the 1950s. He is renowned for his coloured landscapes Beginning the 1970s and still photographing today. H photographs one area over many months and years one of his famous series is The Painters Pools where he photographed an artist's work station as nature began to grow around it. He does a lot of work around in the south west of England. he uses a large format camera to produce 8x10inch (20.5x25.5cm) prints I think the digital images I have produced link well to his style of photography as he uses dense woods and plants similar to what I have done to my own work which i have taken around Toys Hill and Sheffield Park. The image above was taken in the autumn time you can tell that from the colours of the leaves on the trees. He uses a tripod to get the best results possible as you can get more detail. I have done similar images to this artist. and can link my work back to him with my images resembling some of his and the way he take

Kaleidoscope image

Image
To create the image I first opened an image of Trees with lights behind them I then cropped out the stairs and the light so that the trees are the only thing left. I then increased the caves size by clicking on the image tab the canvas size and doubling the size. the duplicate the layer and flip it vertically so that the image is mirrored  then flip the horizontally and move them so that they touch on all sides it will create a kind of mirrored image this will be the completed image unless you want to continue adding more images.just keep increasing the canvas size so you can fit more images on the canvas.

HyperLapse

We took images along the road and using the head of the sculptor on the balcony of hawthorne as reference point. Then moving the tripod slightly so that it creates a smooth movement as the image pans around the sculpture. We then had to load the images into photoshop by clicking file open then selecting the first image in the sequence then clicking image sequence this will open it up with a small window that you can set the frames per second. I set it to 24 and then clicked ok this will create a gif you can then export it. this gif can be seen above

Panorama

Image
To create a panorama in photoshop you have to take a series of RAW images making sure that the images overlap a bit then convert them to TIF files then open up Photoshop then click file automate the click on photo merge then select the TIF files and click ok. the software will do most of the work for you. at the end you flatten the image then crop it down to size. as the image maybe slightly distorted the image to the right is the complete panorama after cropping the image down.

Multiplicty work

Image
We took a series of images in one spot with out adjusting the camera the only thing that changed was where the subject was located within the image this allowed us to create an image from the whole series. Which would include every position the person was in we did this with me walking down the stairs and also Yasper walking down the road. the process to making the image is to open all the images in to photoshop on new layers then create a mask for each layer. Then you take the rubber tool and click on the mask before rubbing out the subject from the layer you are on when they are completely removed you then invert the mask so that the part you rubbed out is the only part of the layer that is visible. you then repeat this for all of the layers apart from the background layer. When you finish editing the layers click on the healing brush tool so that you can tidy up around the edges to give it a more natural look.

subjectivty objective

Image
Subjective/Objective Define: subjective- based on or influenced by personal feelings, tastes, or opinions. "his views are highly subjective" synonyms: personal , personalized,  individual ,  internal ,  emotional ,  instinctive ,  intuitive ,  impressionistic ;  More objective- not influenced by personal feelings or opinions in considering and representing facts. Apply:used when evaluating something This is objective because the image is normally taken though the lenses but it is taken of a lens 

Minor White Investigation

Image
Minor White Was born on July 9th 1908. he took his first set of photographs on a trip to lake superior in Northern Minnesota. In 1937 Minor White started working as a assistant at a photographic studio in Portland Oregon. Which he stayed in for a year. He then went onto photograph the portland commercial waterfront for the Oregon art project in 1939. In 1952 White was a co founder and editor/ director. of Aperture magazine in San Fransisco. from 1965 to 1974 White taught photography at the Massachusetts Institute of technology in Boston. All of his images where taken on film due to there not being any digital cameras back then. All of his images are black and white he sometimes also over exposes some areas so that they go darker. The image above is called twisted trees and its was taken by minor white and was taken on film. the original image was printed at 23.1x 17.1 cm the image was taken at Point Lobos California. The image is of two trees that have started to grow and grow ar

O&C Edited Images

Image

Describing the image

Image
The image is haunting as you don't know what is going to happen as well as the mist that is behind the fence it also has a spooky atmospheric feel to the image. The image is in Black and white. the image also creates tension due to you not knowing what happens next. the medium of this piece of work is decisive moment and is also street photography. The image makes me disturbed because i don't know what happens after the image because it is just one moment in time. r

Darkroom work

in the darkroom I turned my film into images using the enlarger. you first take the negative holding tray out of the enlarger then take it out of the darkroom and find the part of the film you want to dewlap and make sure it is clean before putting it into the enlarger you then turn the enlarger on and make sure that it is focused and fills the frame. cut a test piece and find out if the exposure, focus and size are correct then take a whole piece of the paper and run the machine then put it though the developer which make the image visible and able to leave the darkroom. I took a lot of tests before I found one that I was happy with my finished image.

Graphics week write up

Image
materials  paper pencil rular computer scanner process  illustrator- we learnt how to trace using the pen and pencil tool in design - made a mock magazine cover scanning -scanned our hand done typography into the computer Technical Skills Tracing in illustrator using in design  scanning in work  we first took some cameras and went around the college trying to find objects that looked like letters we then downloaded them on to memory sticks. later in the day. we hand did typographey  We also used the lines to help structure the size and style of the typography. We also had to chose a style to base are typography off for example bubble writing. I chose to base my typography of bubble writing as i don't have much skill with hand drawn letters or anything hand drawn.  We later used the images we took to create a mock magazine cover. Using in design which is a software made by adobe graphic designers use this software when creating the

Health And Safety In The Dark Room

Health and Safety In The Dark Room Make sure that the ventilator is on when working in the darkroom as the fumes from the chemicals are dangerous   Make sure you use gloves if you have any allergies  do not come into physical contact with the chemicals in the tray  Do not use a phone while in the darkroom  Do not mix the tweezers  Always tidy up the props you used in the darkroom Always segregate the chemicals don't mix them  Keep the work area clean to prevent tripping over chemical bottles 

Art and Design Week

Image
Materials Pencil Pens Graphite Charcoal Paints Paint brushes Process Experimenting with using other objects besides paint brushes to create a mark. Drawing textured marks. Technical skills Creating texture using dry and wet media. In the first lesson we used wet and dry media to create a collection of textured marks such as layered lines and scribbles. We then split a A3 into 10 different sized areas. Which we filled with different textured marks. The dry media was stuff like pencils, pens, graphite, and charcoal. The wet media was paints both white and black. In the second half of the day we did print making. we did this with textured wallpaper and oil based ink which meant it was permeant after it was dry. so we had to wear clothes and and apron so that it didn't get on your clothes. The wallpaper was used to create prints. the process we used to print was rolling out a little bit of ink onto a piece of acetate which we then put the wallpaper textured s

Order and chaos and Developing film

Image
We went out around the college and took photos of items related to order and chaos. This could be anything from symmetry or a pattern. Chaos is anything that is messy or unorganised. we took the images on a film camera that contained a roll of film that had 24 or 25 shots on it and we had to share them between a pair so it was 12 shots each. After we took our the pictures around the college of anything involving either order or chaos. We went into The dark rooms where we learnt how to develop film in the pitch black. We did this by opening the container in which the film was contained and unraveling the film to find the end which attached it to the contain which you cut off then you cut off the lip off the roll of film. After this you have to roll it on to a spiral and then place into a developing tank. in which you pour the chemicals there are 10 stages to developing film. The first stage is preparing the chemicals  poor 300ml of X-Tol and 300ml of water into a measuring cylin

Wolf Howard Research

Image
Wolf Howard is an English born pinhole photographer as well as a poet and Filmmaker. He was born on 7th of April 1968 in Strood Kent. He also played drums in garage and punk bands. He is one of the founders of the stuckism movement. He attended Mid Kent College. He also is a painter as well as pin hole photographer. The pin hole camera he uses is a wooden one that has no lenses or viewfinder so he estimates what the camera is aimed at. He and Billy childish founded the stuckism art movement in 1999. His work was exhibited in group exhibitions with other stuckism artist the first was a show called The Stuckism Punk Victorian. This was the first exhibition to show to just exhibit stuckism art this took place in 2004. He left the group in 2006 to pursue a solo career. He exposes his images for 40 seconds to 5 mins.   He says he prefers to use pin hole cameras because he says he enjoys the simplicity of the camera. To replace the photosensitive paper he places the Camera inside A l

Media Advert

Image
What is the point of the carosel  the reason we did the carosel is to learn skills that we could use in our own course Also to see what kind of stuff the other courses involve. We created an Advert that was advertising A Bic 4 in 1 pen. Everyone had a different role on the production of this advert for example camera operator, actor, lighting technician and other elements that are used for TV adverts I was a camera operator in the large TV studio. We had a brief that we could use to create ideas for the advert we were split into groups in which we brainstormed our ideas then the whole group voted on the best one. which was then put into production.  We used Cameras Spotlights And other forms of lighting.  this is the brief we where given. This tells us what the client wants us to create as well as giving us key information which we could use to help generate ideas for our advert. We then decided our the roles we wanted t do within the production of the advert

Man Ray investigation

Image
Man Ray who was born Emmanuel Radnitzky. He was born on August 27 1890 and he died on November 18 1976. He spent most of his career in France. He contributed to the Dada Surrealist. He worked in a Varity of different media but he preferred to be a painter. He did a lot of work which git him well known in the fashion photography area. But he also did photograms which he started to call Rayograms. His parents were Russian and Jewish. He got the name man ray when his family moved to New York and changed their surname to Ray and he was already being called Manny for short so he eventually started to use Man Ray as his name. Man Ray was represented in the first surrealist exhibition along side artists like Pablo Picasso In his later life he recreated his older work and recreated them in new forms. In 1999 Art news magazine named him the 25 th most influential artists of the 20 th century   Man Ray also appeared along side artists such as Salvador Dali who is another

processes, technical skills and materials

The technical skills we have learnt this week is using aperture to change the depth of field using the shutter speed and aperture to create movement blur or freeze an action. using the dark room to create photograms. Process using the wet process to create images . developing the in hole cameras. materials Developer Stop Fixer Pin hole camera Enlarger DSLR

Depth of field

Image
 The image above is showing wide depth of field and was taken with an aperture of f/32 which is a small aperture. The image above is an example of shallow depth of field which was taken with an aperture of f/5.6 this is a wide aperture. When useing different aperture we can adjust the size of it to change the depth of field. Which is how far the focus stretches from the main point that it is focused on. The smaller the aperture the wider the depth of field which means more of the image is in focus. The wider the aperture the shallower the depth of field so the only part that is in focus is the part it was already focused on. using this you can create images that use different depths of field lengths.

Shutter speed and aperture experiments

Image
 the image above was taken with a f/3.5 aperture and a 1/4000s shutter speed it has frozen sam mid jump the image above this one was taken with an aperture of f/22 and a shutter speed of 1s which means that the action has blurred . Shutter speed and aperture work together to create the best exposure possible we can do this by using one to compensate the other so if the shutter speed is quite fast then you should use a wide aperture so that a lot of light can get in. It is the opposite for a long shutter speed the aperture is small so that less light gets in to quickly. A fast shutter speed can freeze A action such as jumping or running and a slow shutter speed will create a ghostly effect. you can also create movement blur by panning the camera and following your subject while they move this will cause the background to blur but the subject stay in focus but i do not have any of my own examples for this.

Stephan's Lesson

In steve's lesson we learnt about the anatomy of the camera and how the light travels though the camera . The light enters the camera though the lenses then goes though the aperture which controls how much light can enter the camera, It then goes to the mirrior which is reflected up into a prism that reflects the light though the view finder which allows us to see what the camera is pointed at. When the shutter realise button is pressed the mirror flips out off the way allowing the light to go though the shutter and hit the light sensitive chip. Which is what creates the image both the shutter speed and the aperture can both be adjusted to change the amount of light that enters the camera. We also took photos experimenting with the shutter speed and aperture and how they work together to get the best expouser possible .For example if there is a wide aperture the camera will use a faster shutter speed to make sure that it is not over exposed making the image to bright. It is the

first lesson write up

           Materials Pin hole cameras  photosenstive paper devloper stop fixer pin hole camera prosses how to take images with a pin hole camera first you place the piece of photo senstive paper into the bottom of the shoe box and stick it down with masking tape before placing the camera infront of the object you want to capture atre that you open the flap and hold it open for 30 secs (times may very)  creating pictograms place a piece of photosenstive paper under the exposer and place objects on top of the paper before running the exposer for 10 seconds which will make the areas that you have covered remain white and the areas you haven't will turn black when you place the paper into the devloper which you need to put it into for 2 minutes after which you put it into the stop which stops the devloper form makeing the image any darker which it stays in for 10 secounds after which you put it into the fixer which means it can leave the dark room with out ruining the image